Restauration de fichiers sur une machine Linux via Veeam
Jump to navigation
Jump to search
Introduction
Nous verrons dans cet article comment effectuer une restauration de fichiers sur une machine Linux.
Déroulé
Connectez vous sur votre machine en SSH et lancer la commande veeam :
Appuyez sur la touche R pour lancer l'invite de restauration :
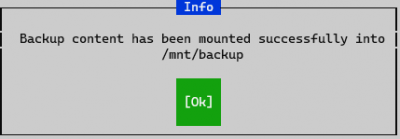
Choisissez votre backup ainsi que le point de restauration en appuyant sur Entrer, le contenu du backup va se monter dans /mnt/backup :
Vous pouvez maintenant naviguer dans votre backup et copier des données :
/mnt/backup# ll
total 73
lrwxrwxrwx  1 root root     7 Jul  9  2019 bin -> usr/bin
drwxr-xr-x  4 root root  1024 Dec 20 10:13 boot
drwxr-xr-x  4 root root  4096 Jul  9  2019 dev
drwxr-xr-x 80 root root  4096 Dec 20 10:30 etc
drwxr-xr-x  2 root root  4096 Jul 12  2019 home
lrwxrwxrwx  1 root root    31 Dec 20 10:12 initrd.img -> boot/initrd.img-4.19.0-22-amd64
lrwxrwxrwx  1 root root    31 Dec 20 10:12 initrd.img.old -> boot/initrd.img-4.19.0-16-amd64
lrwxrwxrwx  1 root root     7 Jul  9  2019 lib -> usr/lib
lrwxrwxrwx  1 root root     9 Jul  9  2019 lib32 -> usr/lib32
lrwxrwxrwx  1 root root     9 Jul  9  2019 lib64 -> usr/lib64
lrwxrwxrwx  1 root root    10 Jul  9  2019 libx32 -> usr/libx32
drwx------  2 root root 16384 Jul  9  2019 lost+found
drwxr-xr-x  3 root root  4096 Jul  9  2019 media
drwxr-xr-x  3 root root  4096 Jul 10  2019 mnt
drwxr-xr-x  2 root root  4096 Jul  9  2019 opt
drwxr-xr-x  2 root root  4096 May 13  2019 proc
drwx------  5 root root  4096 Dec 20 10:09 root
drwxr-xr-x  2 root root  4096 Jul 10  2019 run
lrwxrwxrwx  1 root root     8 Jul  9  2019 sbin -> usr/sbin
drwxr-xr-x  2 root root  4096 Jul  9  2019 srv
drwxr-xr-x  2 root root  4096 May 13  2019 sys
drwxrwxrwt  7 root root  4096 Jul 10  2019 tmp
drwxr-xr-x 13 root root  4096 Jul  9  2019 usr
drwxr-xr-x 11 root root  4096 Jul  9  2019 var
lrwxrwxrwx  1 root root    28 Dec 20 10:12 vmlinuz -> boot/vmlinuz-4.19.0-22-amd64
lrwxrwxrwx  1 root root    28 Dec 20 10:12 vmlinuz.old -> boot/vmlinuz-4.19.0-16-amd64
Pour démonter le backup, il faut simplement relancer la commande veeam et appuyer sur U
Warning: Il est nécessaire de démonter le backup une fois votre restauration terminée, sinon la prochaine exécution de votre job finira en erreur!
Conclusion
Vous pourrez retrouver d'autres articles sur Veeam dans notre catégorie Veeam
Cet article vous a semblé utile ?
0


Activer l'actualisation automatique des commentaires