Comment restorer mon serveur Kimsufi sur une VPS Cloud Ikoula One
Jump to navigation
Jump to search
Restaurer un serveur Kimsufi sur une VPS HOST Cloud Ikoula One :
Nous allons faire une sauvegarde d'un serveur Kimsufi[1] et procéder à la restauration sur un VPS CIO.
Mais c'est quoi le VPS HOST Cloud Ikoula One] ?
Le VPS HOST Cloud Ikoula One [2] est une solution clé en main qui comprend un outil d'orchestration, un load balancer, des règles de firewall et une API compatible EC2.
Les avantages du Cloud Ikoula One :
- Maitrise des coûts : Une facturation établie à l'avance
- Une infrastructure dédiée: Déploiement d'instances privées
- Garantie de faible latence
- Un outil d'orchestration
- Outil d'orchestration
- Infogérance[3]
Préparation serveur Kimsufi
- Démarrer notre Machine virtuel sur un liveCD, par exemple DebianLive :
- Définir un hostname pour facilement identifier la destination de la restoration
root@debian:~# hostname testrestore
- Installation de l'agent Acronis Installation_agent_Linux
- Création des partitions manuellement
- Dans le cas où vous ne souhaitez pas disposez pas d'autant d'espace disque
root@debian:~# fdisk /dev/xvda

Welcome to fdisk (util-linux 2.33.1).
Changes will remain in memory only, until you decide to write them.
Be careful before using the write command.


Command (m for help): n
Partition number (1-128, default 1):
First sector (34-209715166, default 2048): 40
Last sector, +/-sectors or +/-size{K,M,G,T,P} (40-209715166, default 209715166): 2048

Created a new partition 1 of type 'Linux filesystem' and of size 1004.5 KiB.

Command (m for help): n
Partition number (2-128, default 2):
First sector (2049-209715166, default 4096):
Last sector, +/-sectors or +/-size{K,M,G,T,P} (4096-209715166, default 209715166): +97G

Created a new partition 2 of type 'Linux filesystem' and of size 97 GiB.

Command (m for help): n
Partition number (3-128, default 3):
First sector (203427840-209715166, default 203427840):
Last sector, +/-sectors or +/-size{K,M,G,T,P} (203427840-209715166, default 209715166):

Created a new partition 3 of type 'Linux filesystem' and of size 3 GiB.

Command (m for help): t
Partition number (1-3, default 3): 1
Partition type (type L to list all types): 4

Changed type of partition 'Linux filesystem' to 'BIOS boot'.

Command (m for help): t
Partition number (1-3, default 3):
Partition type (type L to list all types): 19

Changed type of partition 'Linux filesystem' to 'Linux swap'.

Command (m for help): w
The partition table has been altered.
Calling ioctl() to re-read partition table.
Syncing disks.

root@debian:~#
- Si vous disposer d'une sauvegarde
Sauvegarde :
sfdisk -d /dev/sda > partition.bak
Restoration :
sfdisk /dev/xvda < partition.bak
- Formatage des partitions
root@debian:~# mkfs.ext4 /dev/xvda2
mke2fs 1.44.5 (15-Dec-2018)
Creating filesystem with 25427968 4k blocks and 6356992 inodes
Filesystem UUID: 675556c0-d8a0-4c4e-b1fd-87d2b3a0f19e
Superblock backups stored on blocks:
        32768, 98304, 163840, 229376, 294912, 819200, 884736, 1605632, 2654208,
        4096000, 7962624, 11239424, 20480000, 23887872

Allocating group tables: done
Writing inode tables: done
Creating journal (131072 blocks): done
Writing superblocks and filesystem accounting information: done

root@debian:~# mkswap /dev/xvda3
mkswap: /dev/xvda3: warning: wiping old swap signature.
Setting up swapspace version 1, size = 3 GiB (3219103744 bytes)
no label, UUID=315aee13-ed19-4408-8d20-74253a3edbff
root@debian:~#
- Montage des partitions ou de la partition dans notre cas :
root@debian:~# mount /dev/xvda1 /mnt
Restauration
Depuis l'interface Acronis, nous allons procéder à la restauration
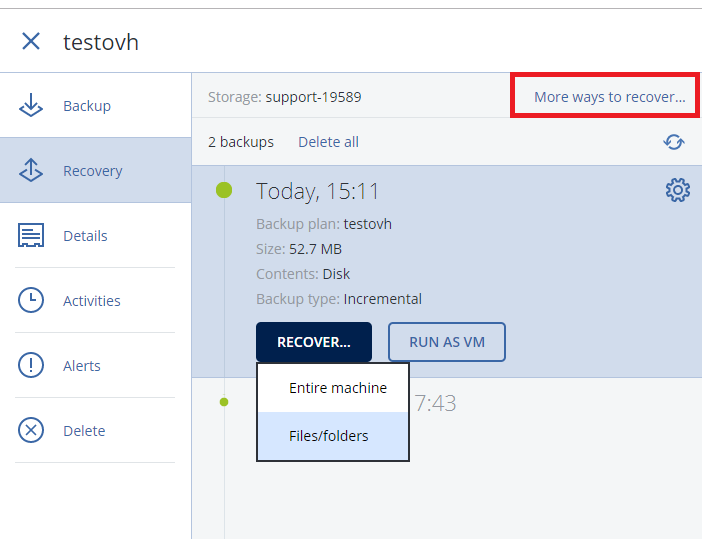
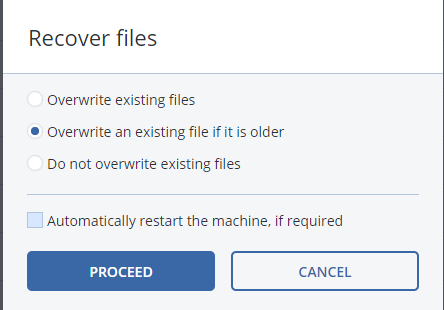
- Sélectionner le serveur à restorer et cliquer sur Recover
- Cliquer sur More ways to recover... afin de choisir la destination de la restoration.
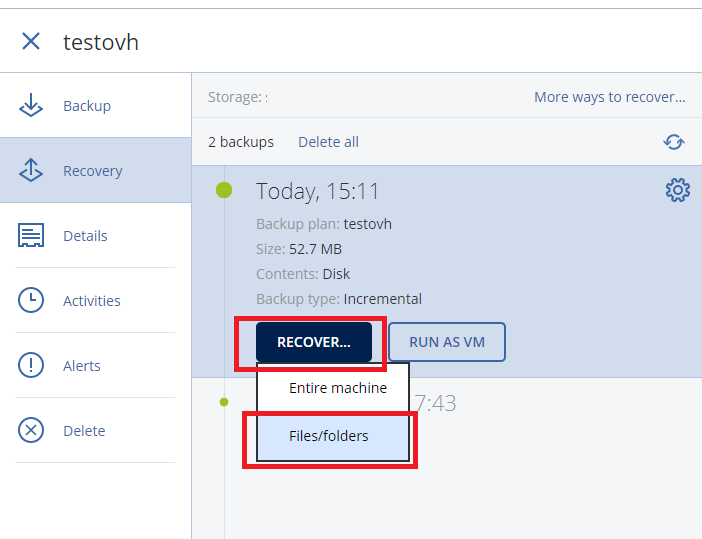
- Cliquer sur Recover... et ensuite sur Files/folders'
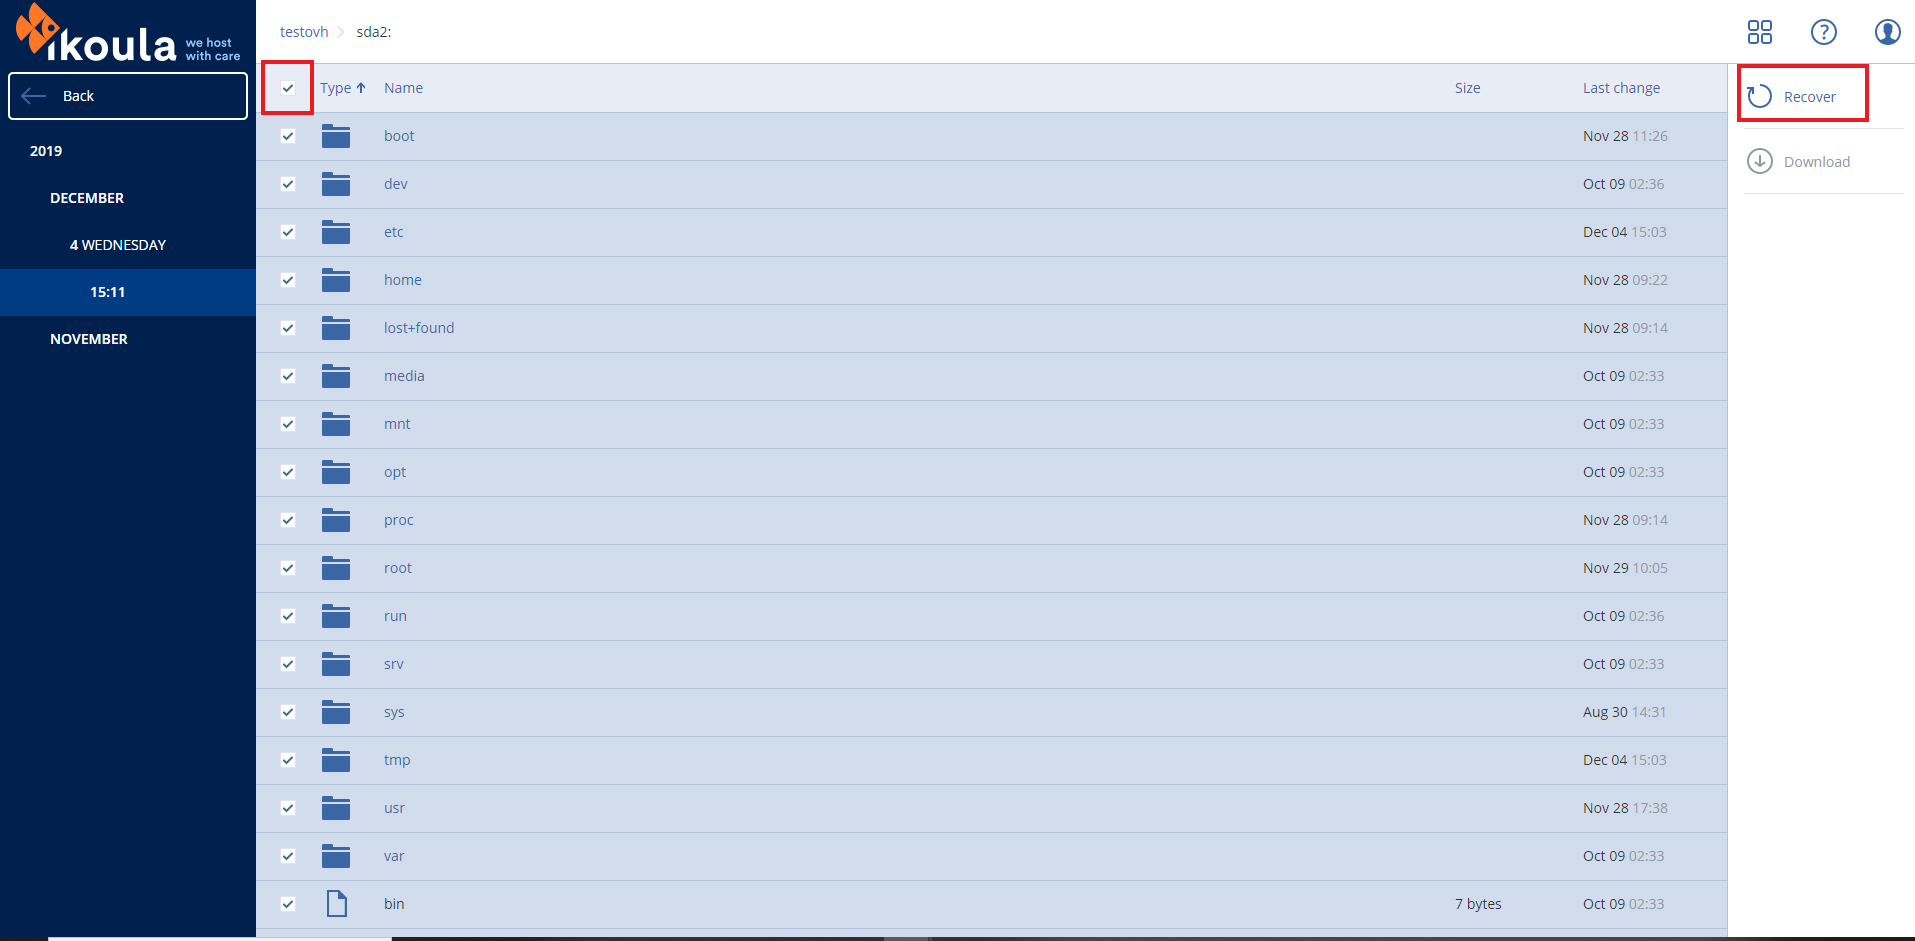
- Naviguer dans l'interface pour choisir l'intégralité des fichier et dossier inclue dans une partition
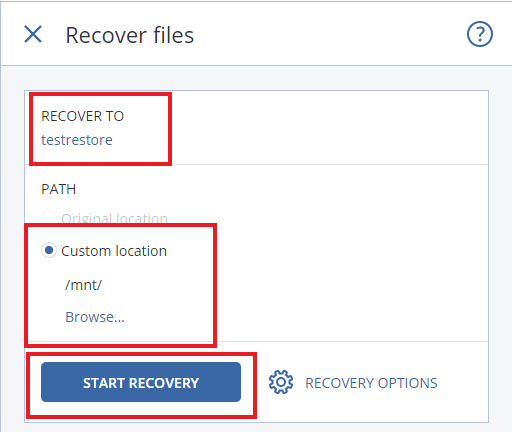
- Confirmer la destination, choisir le montage de la partition restorer
- Ne pas sélectionner le reboot de la destination car nous n'avons pas terminer
Restoration du grub
Pour cela nous allons utiliser la méthode grub-install dans un chroot.
- Nous allons monter l'environnement nécessaire pour effectuer le grub-install dans un chroot
mount --bind /dev/ /mnt/dev
mount -t proc /proc /mnt/proc
mount -t sysfs /sys /mnt/sys
- Nous démarrons maintenant le chroot et lancons un update-grub
root@debian:~# chroot /mnt/ /bin/bash
root@testrestore:/# grub-install /dev/xvda
Installation pour la plate-forme i386-pc.
Installation terminée, sans erreur.
root@testrestore:/#
- Modifier le fichier /etc/fstab afin de prendre en compte
root@testrestore:/# cat /etc/fstab
UUID="675556c0-d8a0-4c4e-b1fd-87d2b3a0f19e" / ext4 defaults 0 0
UUID="2ca7f39a-6609-884a-ac1e-8456b66ca755" swap swap defaults 0 0
root@testrestore:/# blkid
/dev/xvda2: UUID="675556c0-d8a0-4c4e-b1fd-87d2b3a0f19e" TYPE="ext4" PARTUUID="ba22cf4d-5988-254b-9f28-d58bc50f7a4f"
/dev/xvda3: UUID="315aee13-ed19-4408-8d20-74253a3edbff" TYPE="swap" PARTUUID="2ca7f39a-6609-884a-ac1e-8456b66ca755"
/dev/sr0: UUID="2019-11-16-10-15-29-00" LABEL="d-live 10.2.0 st amd64" TYPE="iso9660" PTUUID="1bf56f01" PTTYPE="dos"
/dev/loop0: TYPE="squashfs"
/dev/xvda1: PARTUUID="f40c93d3-7954-784b-afbb-608d428571fc"

root@testrestore:/#
Allons plus loin
Pour améliorer la compatibilité de serveur [4] avec l'environnement cloud CIO et XenServer nous allons pouvoir procéder à l'installation des cloud-init et les XenTools : Installation_des_XenTools_sur_une_instance_CloudStack
Adaptater la configuration
- Cette migration impliquera un changement d'adresse IP, il vous faudra adapter les fichiers de configuration des services(apache, MariaDB, bind,...) afin que ceux-ci écoute avec les adresse IP de CIO.
- Dans le cas ou vous utiliser une plesk, [5] voici une KB qui vous permettra d'effectuer plus simplement cette modification. Comment modifier l'adresse IP utilisée par plesk

