Différences entre versions de « How to update the DNS zone in Plesk »
Jump to navigation
Jump to search
| Ligne 9 : | Ligne 9 : | ||
}} | }} | ||
| − | ===Updating the DNS configuration using the Plesk web hosting platform === | + | ===Updating the DNS configuration using the [https://www.ikoula.com/fr/managed-plesk Plesk] web hosting platform === |
To update the '''''DNS zone''''', you must first login to your Plesk web hosting platform with the credentials that you have received on your e-mail address which is attached to your Ikoula customer account. | To update the '''''DNS zone''''', you must first login to your Plesk web hosting platform with the credentials that you have received on your e-mail address which is attached to your Ikoula customer account. | ||
Version actuelle datée du 23 septembre 2021 à 14:03
Updating the DNS configuration using the Plesk web hosting platform
To update the DNS zone, you must first login to your Plesk web hosting platform with the credentials that you have received on your e-mail address which is attached to your Ikoula customer account.
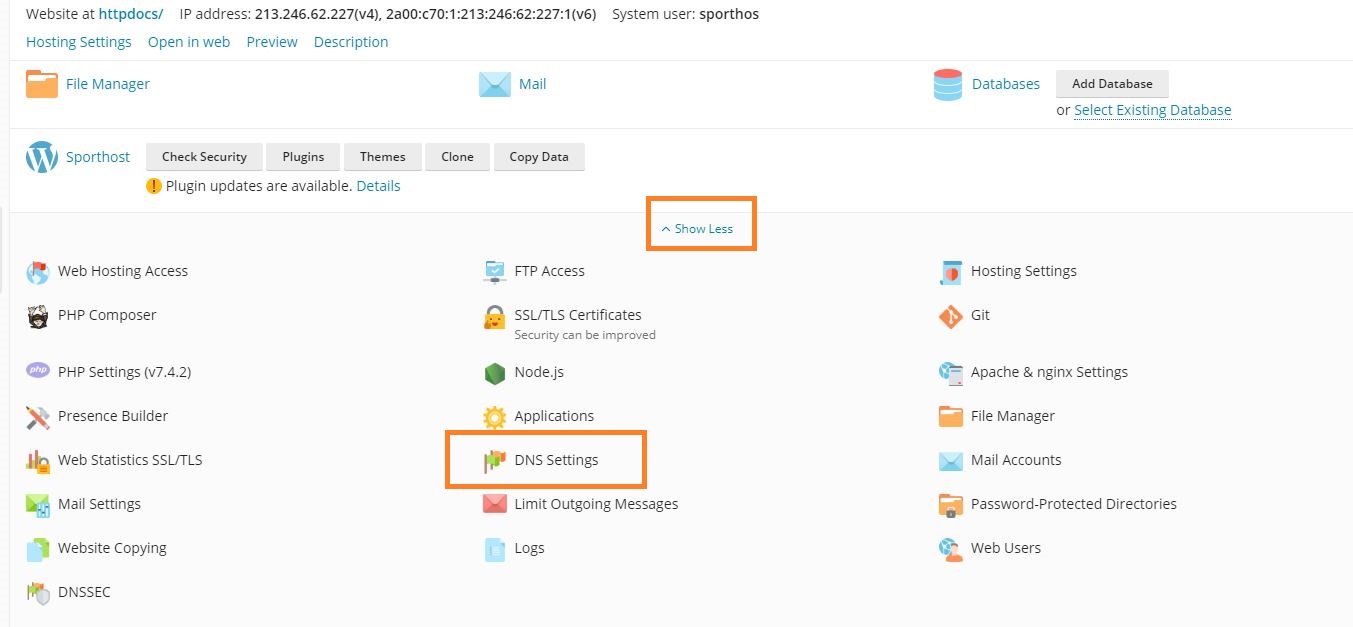
After that on the main dashboard, you have to click on "DNS Settings"(the orange framework).

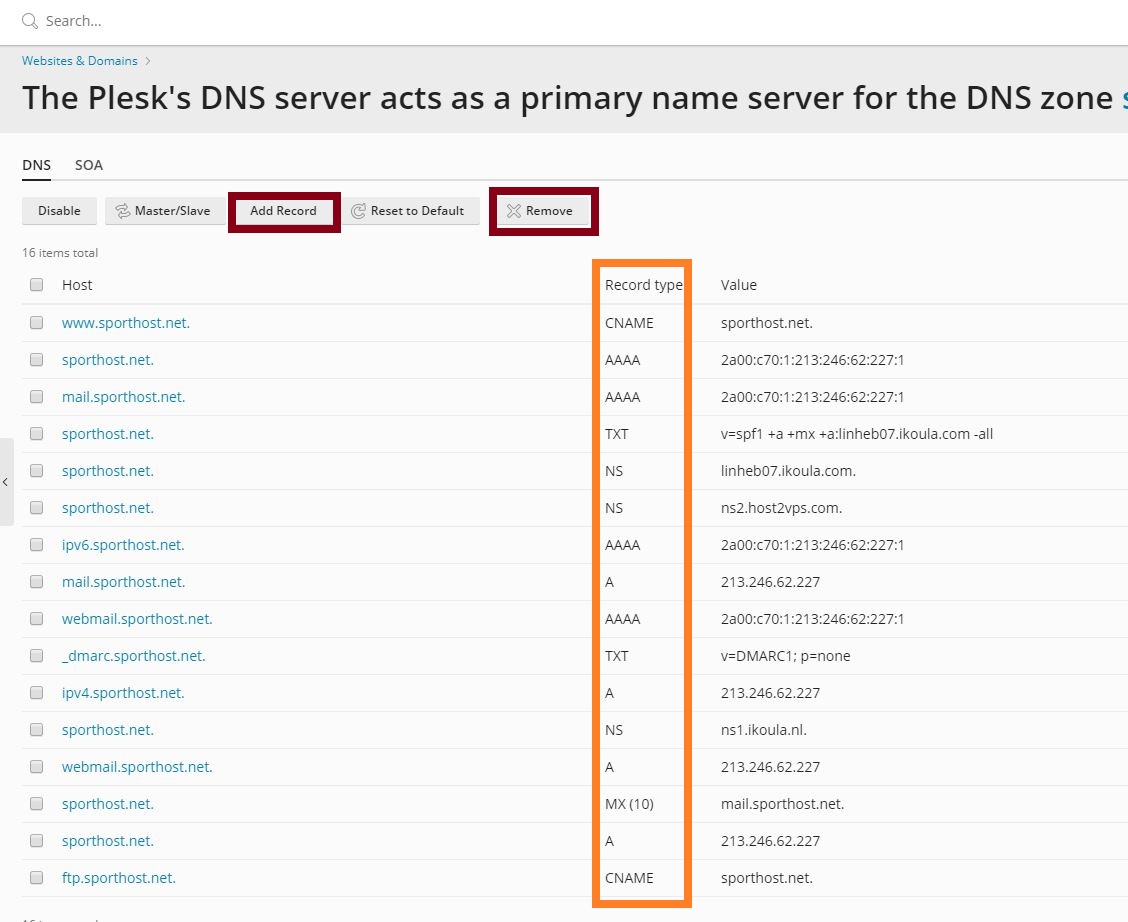
By clicking on the red frameworks you can add / delete records within your DNS zone.
!IMPORTANT If you add/ remove new DNS records and if you want the new change to be updated, make sure you click on "Update DNS" and on "Apply DNS Template".
